
Why Connect Notion to Your IDE?
Imagine your AI coding assistant being able to read your project documentation, update issue trackers, and create meeting notes—all without leaving your IDE. That's exactly what the Model Context Protocol (MCP) enables.
MCP is an open standard that allows AI assistants to interact with external tools and services. While this tutorial uses GitHub Copilot, the same approach works with any MCP-compatible AI—including ChatGPT, Claude, Google Gemini, and others.
Why GitHub Copilot?
We chose GitHub Copilot for this guide because of the reality in many German enterprises: AI tools are often restricted by company policies, and when they are allowed, GitHub Copilot Enterprise with customized access rules is typically the approved option. Since Copilot is permitted in most of our projects, we wanted a way to automatically document our changes directly from the IDE.
Why Notion?
Similarly, enterprise tools like Confluence are often locked down—developers may not have API or MCP access due to IT policies. Our workaround: create documentation in Notion (which offers excellent API access), then manually transfer the content to Confluence when needed. This gives us the automation benefits while staying compliant.
By connecting Notion via MCP, you give your AI assistant the ability to:
- Read documentation – Access your project specs, API docs, and knowledge base
- Update issues – Document bugs, create fix reports, and track progress
- Create content – Generate meeting notes, technical documentation, and more
In this tutorial, we'll walk through the complete setup process.
Prerequisites
Before we begin, make sure you have:
- IntelliJ IDEA (2024.1 or later with GitHub Copilot plugin)
- A Notion account with workspace admin access
- Node.js installed (for running the MCP server)
- GitHub Copilot subscription with chat features enabled
Step 1: Create a Notion Integration
First, we need to create an internal integration in Notion to generate an API token. This token allows the MCP server to authenticate with your workspace.
Navigate to Integrations
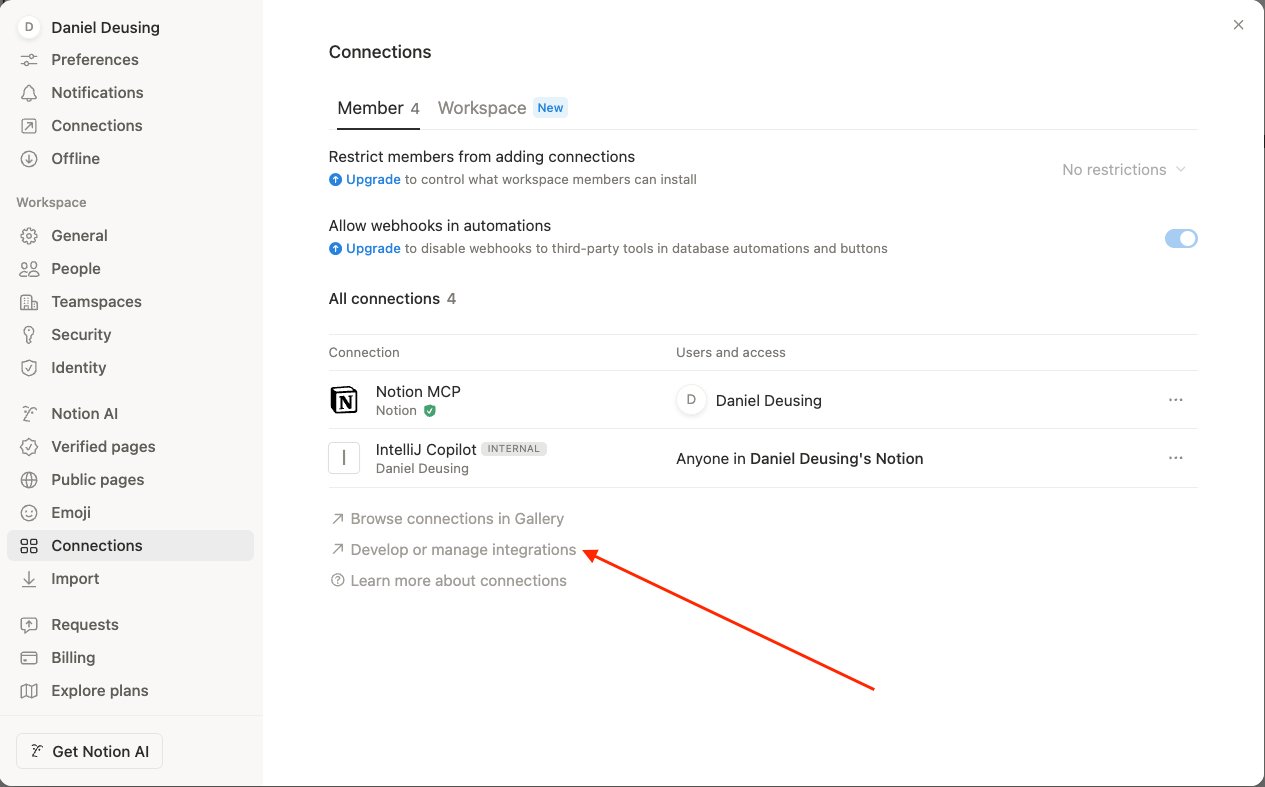
Log in to Notion and go to Settings → Connections. At the bottom of the page, click "Develop or manage integrations". This opens the Notion integrations portal in a new tab.
Create a New Integration
On the integrations page, click "+ New integration".
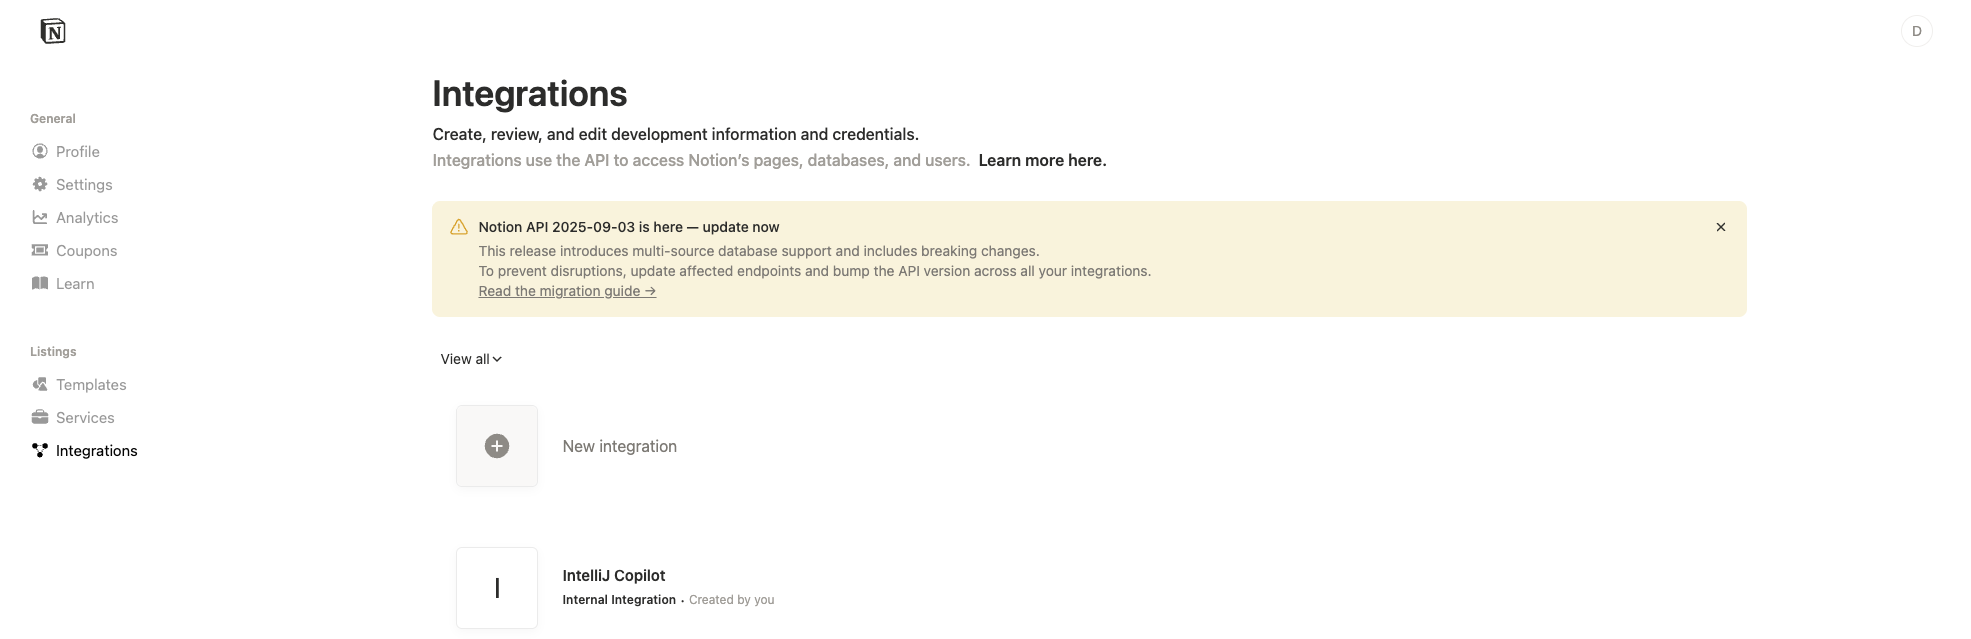
Configure your integration:
- Give it a descriptive name (e.g., "IntelliJ Copilot")
- Select the workspace you want to connect
- Go to the Capabilities tab
- Enable the permissions your AI needs (see below)
- Click Save changes
Required permissions:
- Read content – Required for reading pages and databases
- Update content – Required for editing existing content
- Insert content – Required for creating new content
After saving, copy your Internal Integration Secret (it starts with ntn_). Keep this token secure—treat it like a password.
Grant Page Access
By default, your integration can't access any pages. You need to explicitly grant access to the pages you want the AI to work with.
Go back to Settings → Connections in Notion. Find your integration in the list and click the "..." menu. Select "Manage page access" and choose which top-level pages the integration should have access to.
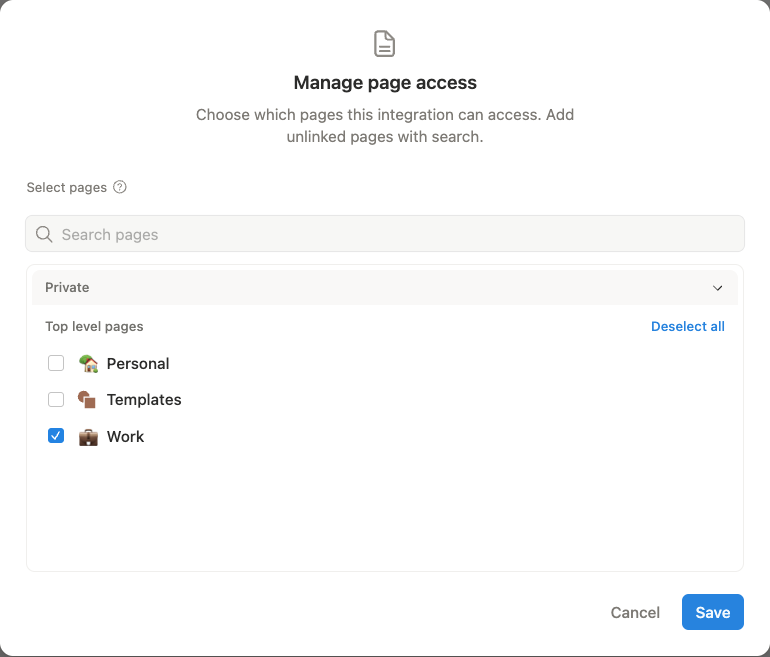
Tip: Start with a specific workspace or project folder rather than granting access to everything. You can always expand access later.
Step 2: Configure MCP in IntelliJ
Now we'll configure IntelliJ to use the Notion MCP server. The easiest approach is to use Notion's official MCP server package.
Open MCP Settings
In IntelliJ IDEA:
- Open Settings (or Preferences on macOS)
- Navigate to Tools → GitHub Copilot → Model Context Protocol
- Click Configure
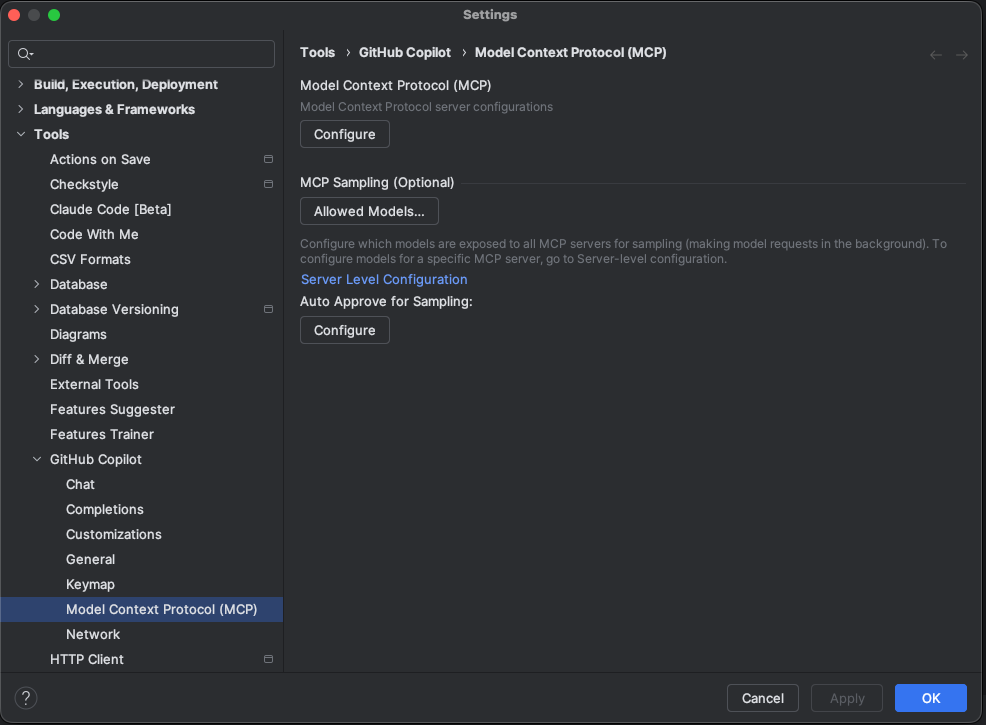
This opens the mcp.json configuration file.
Add the Notion Server
Add the following configuration to your mcp.json file:
{
  "servers": {
    "notion": {
      "command": "npx",
      "args": ["-y", "@notionhq/notion-mcp-server"],
      "env": {
        "NOTION_TOKEN": "ntn_your_token_here"
      }
    }
  }
}
Replace ntn_your_token_here with the integration token you copied earlier.
Verify the Connection
After saving the configuration:
- Open the GitHub Copilot Chat panel
- Select Agent mode from the dropdown
- Click the tools icon (wrench/settings icon)
- Look for "notion" in the list of available tools
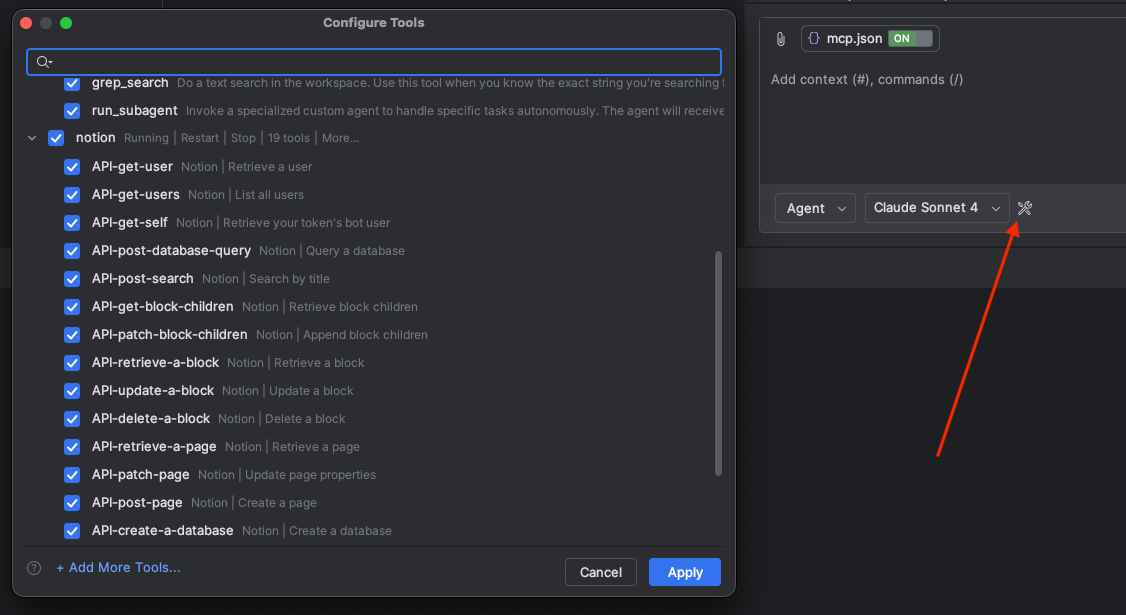
If you see Notion's API tools listed (like API-get-user, API-post-search, etc.), congratulations—you're connected!
Step 3: Test the Integration
Let's verify everything works with a practical example. We'll ask the AI to create documentation in Notion based on a template.
Create a Template (Optional)
For consistent documentation, create a template page in Notion that the AI can reference. For example, an issue tracking template:
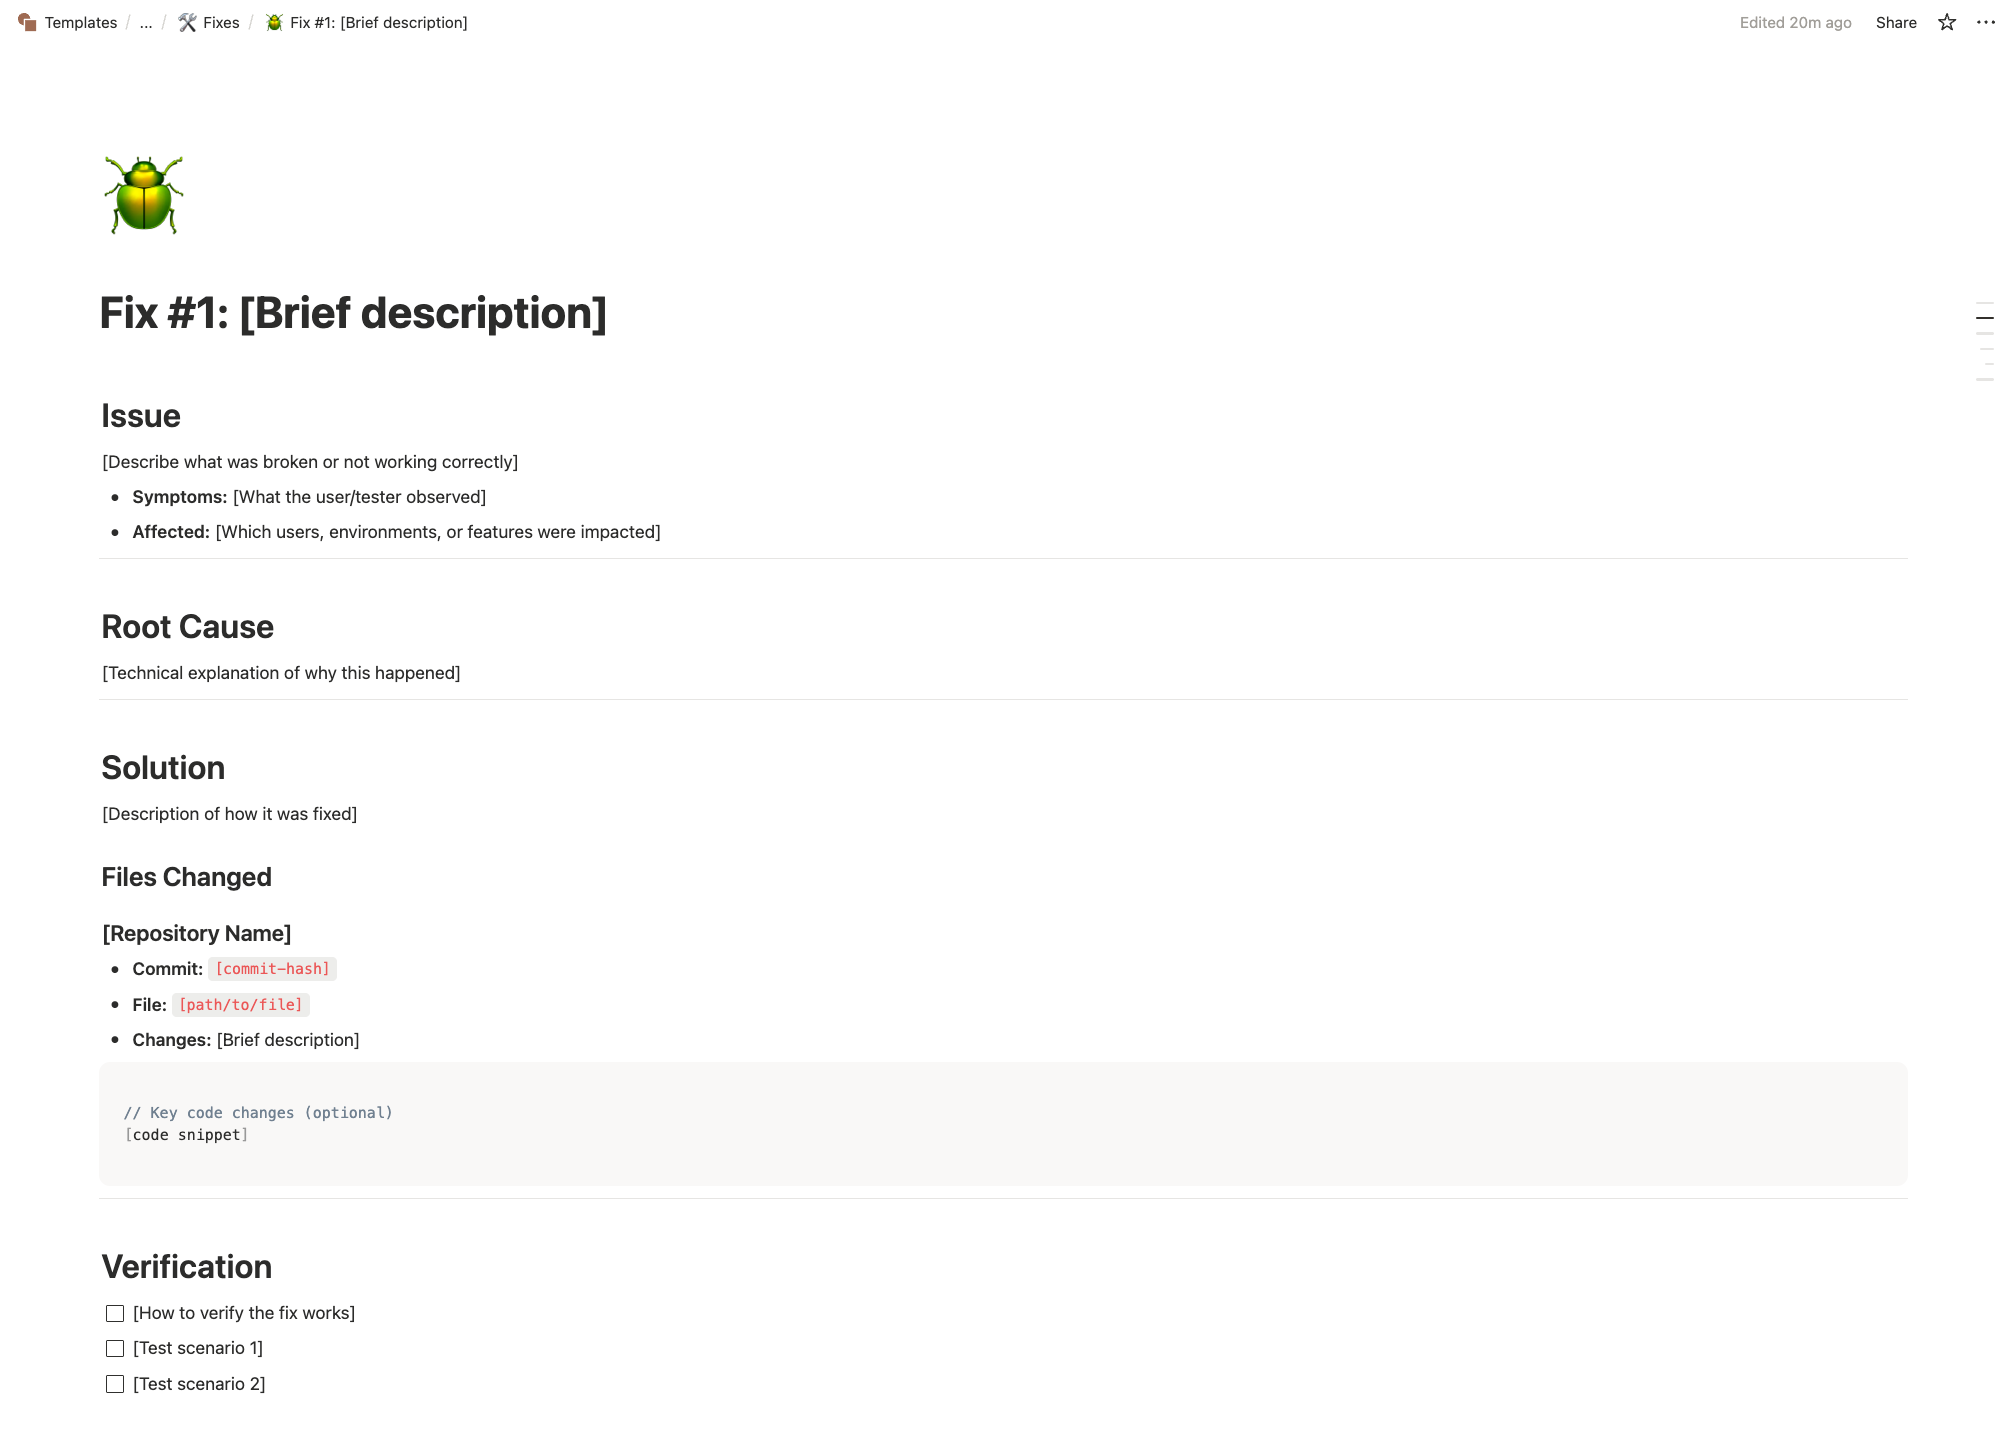
Note: Templates help guide the AI, but don't expect 100% perfect adherence. The AI will capture the general structure and style, which is usually good enough for practical use. You may need to make minor adjustments afterward.
Test with a Prompt
In the Copilot chat, try a prompt like this:
For a demo of documentation, I want you to create
a sample issue report in Notion.

Target page: [Your Notion page URL]
Template reference: [Your template URL]

Use the same style and layout as the template,
and be careful with the correct Notion formatting.
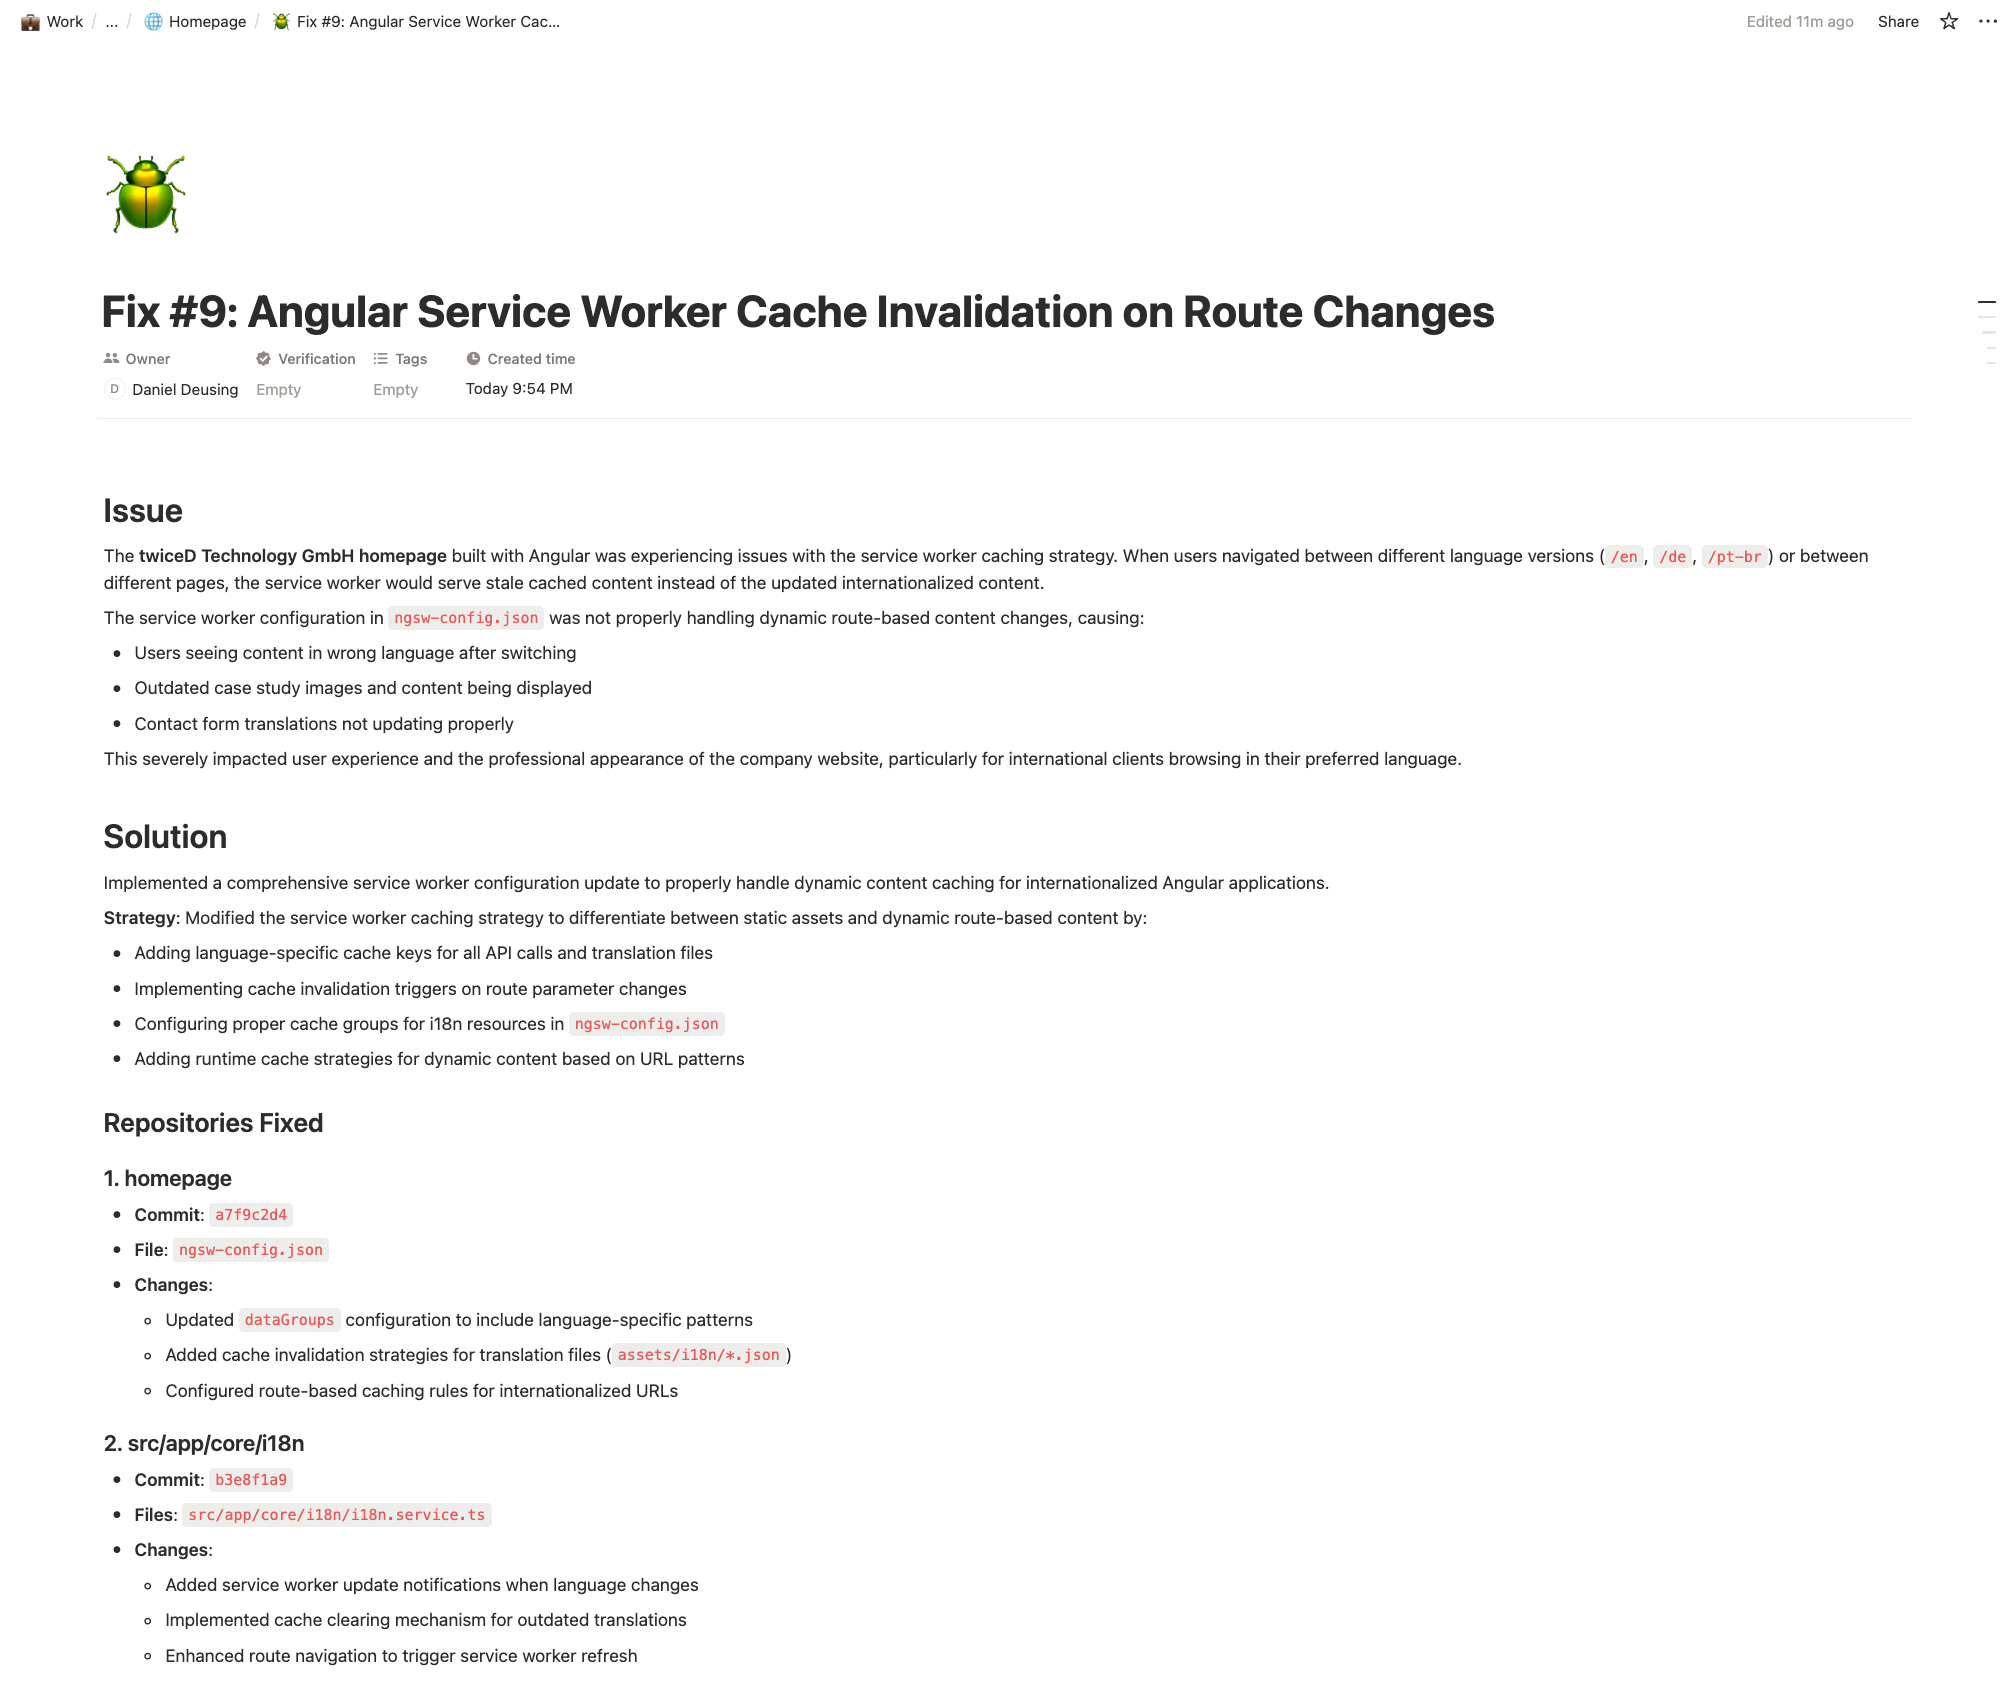
The AI will use the Notion tools to read the template, understand its structure, and create a new properly formatted document.
Practical Use Cases
Once connected, here are some powerful ways to use this integration:
Development Documentation
- Bug reports – "Document this bug I just fixed in our issues database"
- Code reviews – "Summarize the changes in this PR and add to our changelog"
- API docs – "Generate documentation for this endpoint and add to our API reference"
Project Management
- Meeting notes – "Create a meeting summary from these discussion points"
- Task tracking – "Update the status of task X in our sprint board"
- Knowledge base – "Add this solution to our troubleshooting guide"
Research & Learning
- Read context – "Summarize our authentication architecture from the docs"
- Find information – "Search our knowledge base for caching strategies"
Troubleshooting
Tools Not Appearing
If Notion tools don't show up in the tools list:
- Verify your token is correctly formatted (starts with
ntn_) - Check that Node.js is installed and accessible
- Restart IntelliJ after saving the configuration
- Look for error messages in the IntelliJ event log
Permission Errors
If the AI can't access certain pages:
- Verify you've granted page access through the Connections settings
- Check that the integration has the required capabilities enabled
- Remember that access is inherited—granting access to a parent page includes child pages
Connection Issues
If the server fails to start:
- Try running
npx @notionhq/notion-mcp-servermanually in a terminal to see error messages - Ensure you have a stable internet connection
- Check if your firewall is blocking the connection
Conclusion
Connecting Notion to your IDE through MCP opens up powerful possibilities for AI-assisted documentation and project management. Your coding assistant now has context about your project structure, can update your documentation in real-time, and helps maintain consistency across your knowledge base.
The setup takes just a few minutes, but the productivity gains compound over time. Start with a focused use case—like documenting bugs or updating a changelog—and expand from there as you discover new workflows.